
I’ve spent twenty years watching people rush through their maintenance, thinking that if the gun looks shiny on the outside, they’re good to go. But I’ve seen enough “accidents” on my line to know that the real danger lives in the parts you can’t see at a glance. Most folks think cleaning is just about removing carbon, but if you don’t understand how to clean a trigger group safely, you’re essentially playing Russian roulette with your own mechanics. I remember a kid a few years back who thought he could just dunk a whole assembly in solvent to save time; he ended up with a hair trigger that wouldn’t hold, and more importantly, a setup that was completely unpredictable.
In this guide, I’m going to walk you through the slow, methodical way to handle these small, critical components. We aren’t going to talk about fancy ultrasonic cleaners or expensive kits that promise miracles; instead, I’ll show you the manual, disciplined approach to disassembly, cleaning, and reassembly. You’ll learn how to respect every spring and pin as if it were live, ensuring that your trigger remains crisp, reliable, and—most importantly—predictable every single time you pull it.
Guide Overview
Tools & Supplies
- Small punch set for pin removal
- Bench block for stability
- Soft-bristle brush for scrubbing
- Lint-free microfiber cloths for wiping
- Gun cleaning solvent (small amount)
- High-quality gun oil or lubricant (small amount)
- Compressed air canister (optional)
Step-by-Step Instructions
- 1. Before you even think about picking up a screwdriver, you need to establish a clear workspace and verify the firearm is empty. I’ve seen people start cleaning a trigger group while they still have a magazine seated or a round in the chamber because they thought they were “done” with the previous step. Remove the magazine, lock the bolt back, and physically inspect the chamber yourself. Don’t trust the previous person’s word; trust your own eyes.
- 2. Lay out a clean, light-colored cloth or a dedicated parts tray on your bench. You want a surface where a tiny, spring-loaded pin won’t just disappear into the carpet or a dark crack in a wooden table. If you lose a sear spring because you were rushing, you aren’t just looking at a cleaning job anymore; you’re looking at a rebuild project that you might not be prepared for.
- 3. Carefully remove the pins holding the group in place, working from the outside in. If you’re dealing with a pinned housing, use a punch that is the exact diameter of the pin. I’ve seen too many folks use a drill bit or a screwdriver tip that’s just “close enough,” and all they end up doing is marring the finish or mushrooming the pin head. Treat those pins with respect, and they’ll behave.
- 4. Once the components are out, use a soft nylon brush and a dedicated solvent to work the carbon and old, gummy grease out of the crevices. You aren’t looking for a high-pressure blast; you’re looking for a thorough soak and a gentle scrub. Pay special attention to the engagement surfaces where the hammer meets the sear. This is where the magic—and the danger—happens.
- 5. After the solvent has done its work, dry every single part with a lint-free cloth. Moisture is the enemy of a reliable trigger, and leaving even a tiny bit of solvent behind can actually attract more grit and debris later on. You want these parts bone-dry before you even think about applying a fresh layer of lubricant.
- 6. Apply a very light, consistent coat of high-quality oil to the friction points. The biggest mistake I see is people “over-lubricating” because they think more is better. If you have oil pooling in the trigger housing, you’re just creating a magnet for dust that will turn into an abrasive paste after fifty rounds. A single drop on the contact points is usually more than enough.
- 7. Reassemble the group in the reverse order, but don’t just slap it back together. As you seat each pin, move the trigger and hammer through their full range of motion to ensure nothing is binding. Once it’s back in the frame, perform a dry function check—without ammunition in the room, obviously—to make sure the reset is crisp and the engagement feels exactly as it should.
Removing Carbon Buildup Before It Causes Mechanical Failure
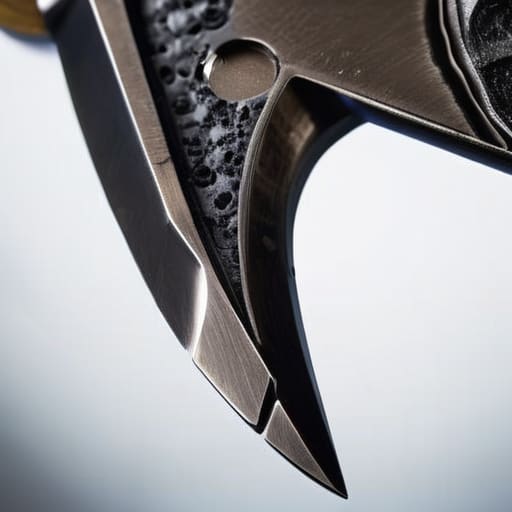
When you’re looking at a trigger assembly, carbon doesn’t always look like the black soot you expect. Sometimes it’s just a thin, gritty film that settles into the sear engagement surfaces. If you ignore it, that grit acts like sandpaper every time you pull the trigger. Over time, you aren’t just dealing with a dirty gun; you’re eroding the very parts that ensure a predictable break. I’ve seen guys skip this step because the gun “felt fine,” only to have a light primer strike or a double-pull a month later. Removing carbon buildup isn’t just about aesthetics; it’s about ensuring the metal surfaces stay true to their original geometry.
Don’t go at it with a wire brush like you’re scrubbing a cast-iron skillet. You want to be surgical. Use a nylon brush or a dedicated cotton swab to work the cleaner into the tight corners where the spring meets the housing. Once the grit is gone, you have to focus on preventing mechanical failure by applying a microscopic layer of oil. If you over-lubricate, you actually create a new problem by attracting more carbon and dust, turning your cleaning effort into a sludge trap. Keep it light, keep it clean, and keep it consistent.
Lubricating Trigger Mechanism for a Lifetime of Reliability
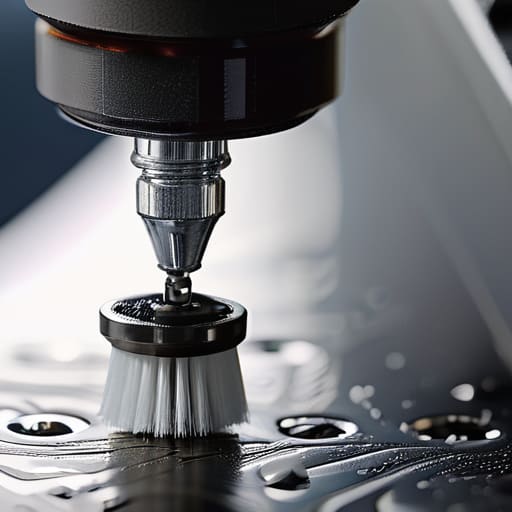
Now that you’ve finished removing carbon buildup, the temptation is to just douse everything in oil and call it a day. Resist that urge. When you’re lubricating trigger mechanism components, less is almost always more. If you over-lubricate, you’re just creating a sticky paste that attracts grit and dust the next time you head to the range. I’ve seen plenty of shooters wonder why their trigger pull feels heavy or “mushy” after a cleaning session, and nine times out of ten, it’s because they treated the trigger group like a deep fryer.
Instead, use a single drop of high-quality oil on the pivot points where the pins meet the housing. You want a microscopic film, not a puddle. Focus on the contact points where the sear meets the hammer; that’s where the friction lives. If you’re working with a precision-tuned setup, even a tiny bit of excess can change the geometry of how those parts interact. Treat this part of your firearm maintenance safety routine with the same patience you used during disassembly. If you get the lubrication right, the parts will glide; if you get it wrong, you’re just building a magnet for trouble.
The Small Things That Keep the Big Things Safe
- Work on a dedicated, well-lit surface with a tray. Those tiny springs and pins have a way of vanishing into a carpet the second you stop paying attention, and a lost spring is a recipe for a dangerous malfunction later.
- Verify the status of the firearm three times before you even touch a cleaning rod. I don’t care if you just finished a range session; clear the chamber, pull the trigger (if safe to do so), and visually inspect it again.
- Use a non-conductive, non-corrosive cleaning agent. Some of those heavy-duty solvents can eat through the finish or, worse, affect the temper of the metal in your sear. If you wouldn’t use it on a precision machine tool, don’t use it on your trigger.
- Inspect for burrs or rounding on the engagement surfaces. While you’re cleaning, you’re actually inspecting. If a surface looks worn or uneven, don’t just scrub it—realize that a compromised sear is a safety hazard, not just a dirty part.
- Never force a component back together if it doesn’t seat perfectly. If a pin feels stubborn, stop. Forcing parts into place is how you bend a lever or crack a housing, and a mechanical failure under fire is something nobody wants to deal with.
The Three Rules of the Bench
Treat every component as if it’s under tension; a spring might look relaxed, but it only takes one slip to turn a cleaning session into a trip to the urgent care.
Respect the buildup; don’t wait for a gritty pull or a failure to function to start cleaning, because by then, the carbon has already started its work.
Less is more with the oil; if you’re seeing pools of lubricant in your trigger housing, you aren’t cleaning it, you’re just making a magnet for more grit.
The Final Check
At the end of the day, cleaning a trigger group isn’t about making it shine for a photo; it’s about the mechanical integrity of the parts that actually do the work. We talked about clearing the carbon so nothing sticks, being careful with those tiny springs, and applying just enough oil so things move smoothly without becoming a magnet for grit. If you rush the assembly or skip the visual inspection of the sear, you aren’t just being lazy—you’re creating a mechanical uncertainty that shouldn’t exist in a safe firearm. Remember to double-check that every pin is seated and that the reset feels exactly as it should before you ever think about putting that piece back into a loaded firearm.
I’ve spent twenty years on the line watching people treat maintenance like a chore they can breeze through, and I’ve seen that exact lack of focus lead to trouble. The real difference between a hobbyist and a shooter is the respect shown to the machine during the unglamorous moments. When you take the time to do these checks properly, you aren’t just maintaining gear; you are cultivating a habit of discipline that carries over to every shot you take on the range. Get the small, quiet rituals right, and the shooting itself will always take care of itself.
Frequently Asked Questions
If I notice a tiny bit of grit in the housing, do I need to strip the whole thing down, or can I just blow it out with some compressed air?
Don’t just blow it out. Compressed air can actually be your enemy here; it often pushes that grit deeper into the sear or behind the springs where you can’t reach it. If you feel grit, it’s already where it shouldn’t be. I’d rather see you strip it down and wipe it clean with a lint-free cloth. It takes five minutes more, but it’s the only way to be sure.
Is there a specific type of grease I should be using on the sear, or is standard gun oil enough to keep it from getting gummy?
Stick to a high-quality synthetic oil for the sear. I’ve seen folks try to use heavy grease to solve a creak, but grease is just a magnet for carbon and grit. In a trigger group, that buildup turns into a paste that can actually slow your reset or, worse, cause a malfunction. Keep it light, keep it clean, and let the oil do its job. A little goes a long way.
How often should I actually be doing this—is once a month enough, or am I waiting too long between cleanings?
There isn’t a calendar for this. If you’re shooting a hundred rounds of dry powder a month, once a month might be fine. But if you’ve just spent a day on a dusty range or ran through a few high-volume mags, you clean it then. I don’t care what the manual says; I care about what you see. If the action feels gritty or the reset isn’t crisp, you’ve waited too long. Trust the mechanics, not the clock.




