I watched a guy last Saturday spend forty minutes obsessing over his optics, polishing the glass until it shone, only to ignore the black, crusty buildup around his muzzle. He thought as long as the glass was clear, he was ready to go, but he was actually inviting a failure right when he needed reliability most. Most folks think the real work is just the shooting, but if you don’t know how to clean a suppressor host properly, you’re just waiting for a carbon lockup to ruin your day. It isn’t about making things look pretty for a photo; it’s about preventing the malfunctions that turn a fun afternoon into a frustrating headache.
In this guide, I’m going to skip the fluff and get straight to the grit of it. I’ll show you the specific, unglamorous steps for breaking down the assembly and removing that stubborn carbon without stripping your threads or ruining your finish. We’ll talk about the right solvents and the proper mechanical approach to ensure your gear stays reliable long after the range session ends.
Guide Overview
Tools & Supplies
- Solvent-soaked patches and cleaning rod for manual scrubbing
- Ultrasonic cleaner (optional) for deep carbon removal
- Soft nylon brush for cleaning threads and tight crevices
- Compressed air canister for drying components
- Carbon/lead solvent (specific to suppressor use)
- Lint-free cleaning patches (bulk pack)
- Degreaser or isopropyl alcohol for final wipe down
Step-by-Step Instructions
- 1. First things first, you need to get everything stripped down and organized. Don’t just toss your parts into a plastic bin; lay them out on a clean, well-lit workbench. You’ll want your solvent, a few different sized brushes, and some lint-free rags. If you’re working on a rifle, make sure the action is completely clear and the magazine is out of the well before you even think about reaching for a cleaning rod.
- 2. Once you’ve got your workspace set, start with the most obvious culprit: the carbon buildup. Use a dedicated carbon remover and let it sit on the suppressor-side threads and the muzzle device for a few minutes. Don’t just scrub immediately; you want to give that chemistry time to work so you aren’t just pushing hard, baked-on grit around the surface of the metal.
- 3. Now, grab your brushes. You’ll want a stiff nylon brush for the lighter stuff, but don’t be afraid to use a brass brush on the heavier carbon deposits around the threads. Be careful not to go too heavy on the finish if you’re working with something specialized, but the goal here is to get into those tiny thread grooves where carbon likes to hide and cause mounting issues later.
- 4. After you’ve scrubbed the heavy lifting away, it’s time to rinse and dry. Use a bit of solvent or even a pressurized air canister to blow out the loosened debris. This is the part most people rush through, but if you leave residual grit in the threads, you’re going to experience uneven torque or even a baffle strike down the road. Wipe everything down with a clean rag until there’s no visible residue left.
- 5. Take a close look at the mounting surfaces. I’ve seen plenty of shooters ignore this, but you need to inspect the threads on both the host and the suppressor for any signs of galling or damage. If the threads don’t look clean and sharp, your suppressor isn’t going to seat correctly. It’s much easier to spot a problem now than when you’re trying to fix a stuck suppressor at the range.
- 6. The final step is the most important for long-term reliability: lubrication. Apply a very thin, even coat of high-temperature anti-seize or specialized suppressor grease to the threads of the host. You aren’t looking for a thick, gloopy mess; you just want a microscopic layer that prevents carbon from welding the components together during your next heat cycle.
- 7. Reassemble everything and do a manual check. Thread the suppressor back on and ensure it moves smoothly and seats firmly. Once it’s tight, give the whole setup a quick wipe to catch any excess grease you might have applied. If it feels right and looks clean, you’re ready for the next trip to the range.
Removing Carbon Buildup From Muzzle Device Without the Struggle
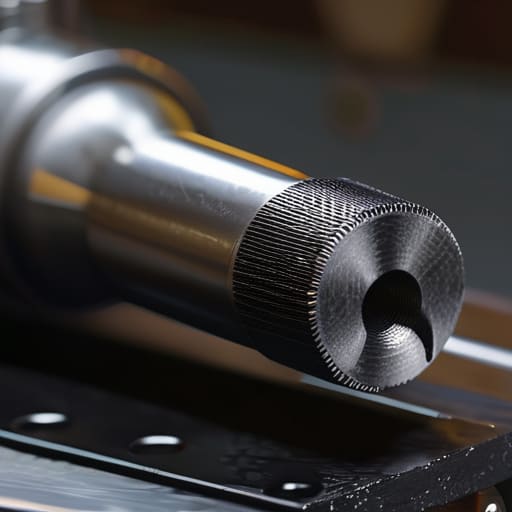
Now, if you’ve been running suppressed, you know that the carbon doesn’t just stay inside the can; it migrates. It loves to find a home in the threads and the small crevices of your muzzle device. I’ve seen too many folks try to manhandle a stuck brake or flash hider with a pipe wrench because they let the grit sit too long. When you’re removing carbon buildup from muzzle device components, don’t try to brute force it. If it feels seized, it’s likely just carbon acting like glue. Use a dedicated solvent for carbon removal and let it sit. Give it ten minutes. Let the chemistry do the heavy lifting so you don’t end up stripping those precious threads.
Once you get the device off, take a look at the mounting surface. If you leave even a thin film of burnt powder behind, you aren’t maintaining suppressor compatibility—you’re inviting a misalignment. A slightly crooked mount can lead to baffle strikes, and that’s a mistake you only make once. Use a stiff nylon brush to clear the grooves. You want that interface clean enough to shine, ensuring the suppressor seats perfectly every single time you go downrange.
The Right Solvent for Carbon Removal and Maintaining Suppressor Compatibili
You can spend all day scrubbing with a brass brush, but if you’re using the wrong chemistry, you’re just moving the problem around. I’ve seen folks try to use harsh, industrial-grade degreasers on their threads, only to find they’ve stripped the protective coating right off the finish. When you’re looking for a solvent for carbon removal, you want something that breaks down the grit without eating your hardware. A dedicated carbon solvent that is safe for both your muzzle device and the suppressor itself is the only way to go.
The real trick is maintaining suppressor compatibility by ensuring no residue is left behind in the mounting interface. If you leave even a thin film of oily solvent or leftover carbon in those threads, you’re inviting a baffle strike or a stuck mount later on. I always tell my students to finish with a dry wipe. You want those surfaces bone-dry and clean. It’s a small step, but it’s the difference between a smooth setup and a fight you won’t win at the range.
The Little Things People Miss When They’re Done Cleaning
- Don’t just wipe the threads and call it a day. Take a nylon brush and get into those grooves; if there’s even a tiny bit of grit or old carbon left in the threads, you’re going to have a nightmare trying to get that suppressor back on straight next time.
- Watch your finish. I’ve seen too many folks use heavy-duty abrasives that strip the phosphate or cerakote right off the host. You want the carbon gone, not the protective coating that keeps the metal from rusting.
- Check your o-rings and crush washers. If you’re using a washer, check it for deformation. If you have an o-ring on your mount, make sure it isn’t cracked or flattened. Replacing a fifty-cent part is a lot better than dealing with a baffle strike because your mount wasn’t seated true.
- Use a dry cloth for the final pass. Once you’ve used your solvent and gotten the carbon out, wipe it down with a clean, dry rag. Leaving a film of wet solvent on the muzzle can actually trap moisture against the steel, which is just asking for pitting.
- Inspect the shoulder. This is the part where the suppressor actually meets the barrel. If that shoulder isn’t clean and square, your suppressor won’t sit concentric. I’ve seen enough groups wander off to the left just because someone was too lazy to clean the shoulder properly.
The Bottom Line on Suppressor Maintenance
Don’t let carbon build-up become a permanent fixture; if you wait until the threads are choked with grit to clean that host, you’re making your life harder than it needs to be.
Pick a solvent that actually works on carbon but won’t eat your finish, because a clean host is useless if you’ve stripped the protective layer right off the metal.
Treat the cleaning process as a habit, not a chore you do only when things stop working; the best way to avoid a malfunction at the range is to do the unglamorous work at home.
The Long Game of Maintenance
At the end of the day, keeping your suppressor host clean isn’t about making the rifle look pretty for the guys at the club; it’s about ensuring that when you actually need that tool to perform, it does exactly what it’s supposed to. You’ve got to pick the right solvent, get that carbon off the muzzle device without stripping your finish, and never skip the inspection of the threads. If you’re lazy with the small stuff—the carbon buildup in the crevices or the grit in the mounting surface—you’re just setting yourself up for a baffle strike or a failure to lock up when the pressure hits. It’s a tedious process, but it’s the only way to ensure your gear stays reliable.
I’ve spent twenty years watching people treat their equipment like it’s invincible, only to see them struggle with a jammed system because they thought they could skip a cleaning session. Real proficiency in this sport isn’t just about how tight your groups are on a piece of paper; it’s about the discipline of the routine. When you take the time to do these unglamorous checks, you aren’t just maintaining a piece of metal—you’re respecting the mechanics of the tool and the safety of everyone on the line. Get the maintenance right, and the shooting will take care of itself.
Frequently Asked Questions
If I can't get all the carbon out of the threads, is it actually dangerous to thread the suppressor back on?
It’s not likely to blow something up, but it’s a bad habit that’ll cause a headache later. If you leave carbon in those threads, you aren’t getting a true, concentric seat. That means your suppressor might sit slightly crooked. If it’s off-center, you’re looking at a baffle strike, and that’s an expensive way to learn a lesson. Clean the threads until they’re smooth. Do it right the first time.
Do I need to worry about using certain solvents on the host if I'm planning on using a titanium suppressor?
You’re right to be cautious. Titanium is tough, but it isn’t invincible. Some of those harsh, high-acid solvents that eat through carbon on steel can actually mess with the finish or the surface integrity of a titanium host. If you’re using a titanium can, stick to the milder, specialized cleaners we talked about earlier. It’s better to spend an extra ten minutes scrubbing with a safe solvent than to find out your expensive suppressor has been chemically compromised.
How often should I be doing this deep clean versus just a quick wipe-down after a range session?
Look, a quick wipe-down is fine if you’re just checking for loose parts, but it won’t save you from carbon buildup. I tell people to do a proper, deep clean every time they finish a heavy range day. If you’re running high round counts, don’t wait for the suppressor to seize up on the threads. Get into the nooks and crannies now, or you’ll be fighting a much harder battle later.




