I watched a kid on the line last Saturday try to fix a feeding issue by dousing his mags in a can of aerosol cleaner and scrubbing them with a brass brush like he was polishing silverware. He thought he was being thorough, but he was actually just stripping the factory finish and inviting corrosion into the spring tension. Most folks think a little extra elbow grease is the answer, but when it comes to how to clean a magazine without ruining it, more aggression usually equals more malfunctions. You can’t just treat these components like scrap metal; they are precision-engineered tools that rely on specific tolerances to feed your rifle reliably.
In this guide, I’m going to skip the fluff and show you the right way to handle your feeding devices. We’ll go over the specific tools you actually need, which solvents are safe for the follower, and—most importantly—the parts you should leave alone. I want to make sure that when you’re actually downrange, your gear is working for you, not against you. If you follow these steps, you’ll learn how to clean a magazine without ruining it and keep your equipment reliable for the long haul.
Guide Overview
Tools & Supplies
- Microfiber cloth for wiping surfaces without scratching
- Soft nylon brush or old toothbrush for crevices
- Cotton swabs for precision cleaning
- Gun oil or CLP (Cleaner, Lubricant, Preservative) 1 small bottle
- Isopropyl alcohol 70% or higher 1 small bottle
- Lint-free rags 2-3 pieces
Step-by-Step Instructions
- 1. First thing you do is clear the workspace and get your tools ready. You aren’t going to fix a feeding issue with a rag and a prayer; you need a small, stiff-bristled brush—an old toothbrush works fine—and some decent solvent. Most importantly, get a clean tray or a shallow dish to catch the small parts. I’ve seen too many guys lose a follower or a spring to the floor of a workshop, and once that happens, that magazine is nothing more than a very expensive paperweight.
- 2. Once you have your space set up, carefully depress the follower and remove the spring. If you’re working with a spring-loaded follower, don’t try to fight it with your fingernails; use a tool or a steady hand to keep it from launching across the room. Once the spring is out, set it aside in your tray. You want to keep these components together so you aren’t guessing which spring goes with which body later on.
- 3. Now, look inside the magazine body. You’re looking for carbon buildup, brass shavings, or that fine grit that works its way in from the range. Use your brush and a little solvent to scrub the interior walls. Don’t go overboard with the liquid; you aren’t washing a car. You just want to break up the grit in the corners. If you soak the inside with too much oil, you’ll end up with a sticky mess that actually traps more dirt the next time you go to the range.
- 4. Take a look at the follower and the spring separately. For the follower, just wipe it down with a dry cloth to remove any oily residue. For the spring, you want to check for any signs of corrosion or kinks. If it’s just dirty, a quick wipe is enough. If you see rust, you’ve got a bigger problem, but for most routine cleaning, the goal is simply to remove the friction caused by old, dried-out lubricant.
- 5. This is where people usually mess up: the inspection. Before you put everything back together, take a bright light and look at the feed lips. Check for any cracks, bends, or significant wear. If those lips are spread too wide, your rounds aren’t going to sit right, and you’ll be fighting constant malfunctions. If the metal looks compromised, don’t try to bend it back into shape with pliers; just replace the magazine.
- 6. Reassembly is the reverse of how you took it apart, but you have to be deliberate. Seat the spring back in, then carefully guide the follower into place. As you push the follower down, make sure it stays level and centered. If it tilts to one side while you’re compressing the spring, you might catch an edge and damage the follower or the magazine walls.
- 7. Finally, once it’s put back together, give it a manual function check. Load a few dummy rounds—not live ammo, obviously—and cycle them through the magazine. You want to feel a smooth, consistent movement. If it feels sluggish or catches, you either have left too much oil inside or there’s still a piece of grit stuck in a corner. Do it until it’s smooth, because a magazine that works in your hands must work when the timer starts.
Mastering Magazine Disassembly Steps Without Breaking the Feed Lips
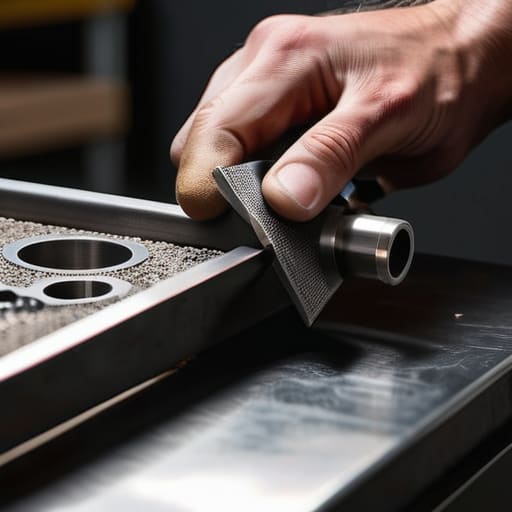
When you’re working through your magazine disassembly steps, the biggest mistake I see is people treating the metal like it’s indestructible. It isn’t. Those feed lips are the most sensitive part of the entire assembly; they dictate whether a round goes into the chamber or gets stuck halfway there. When you’re using a tool to depress the follower or tension the spring, do it with a steady, controlled pressure. If you feel a sudden resistance, stop immediately. You aren’t trying to win a wrestling match with a piece of steel; you’re just trying to get it open so you can get to the grit inside.
Once you have it apart, don’t just go at it with a wire brush. You want to focus on cleaning the spring and follower using a dedicated, non-residue solution. I’ve seen too many folks use heavy oils that turn into a sticky paste when mixed with dust, which eventually causes the spring to bind. Instead, use safe cleaning solvents for magazines that evaporate cleanly. Your goal is to remove the friction, not add a layer of sludge that will turn your reliable mag into a paperweight by mid-season.
Removing Carbon Buildup From Magazines Using Only Safe Cleaning Solvents Fo
Now, once you’ve got that magazine open, you’re going to see the real problem: a fine, black soot coating the interior walls. That’s carbon, and it’s more than just a mess; it’s a friction nightmare. When you’re removing carbon buildup from magazines, the temptation is to grab a heavy-duty degreaser or something that smells like a chemical plant. Don’t do that. Harsh solvents can eat through the finish or, worse, degrade the polymer if you’re working with newer mags. Stick to dedicated, mild cleaning solvents designed for firearms. You want something that breaks down the grit without leaving a residue that attracts more dust later.
I’ve seen guys try to scrub this out with steel wool or stiff wire brushes because they’re in a hurry. That’s a fast way to gouge your internals. Instead, use a nylon brush or even an old, soft toothbrush. You want to be thorough when cleaning the spring and follower as well. If carbon gets lodged in the coils of that spring, it won’t compress smoothly, and that’s exactly how you end up with a failure to feed when you’re actually on the line. Take your time; the goal is a smooth surface, not a polished one.
Five Things You’ll Learn the Hard Way if You Don't Listen
- Watch those feed lips like a hawk. I’ve seen plenty of folks use pliers to pry things open, and once you bend those lips even a fraction of a millimeter out of spec, that magazine is nothing more than a very expensive paperweight. Use your fingers and a little patience.
- Stop using the heavy-duty solvents you use for your bolt carrier group. Those aggressive chemicals can eat away at the finish or even degrade the spring tension over time. Stick to a light, dedicated cleaner or just a dry, lint-free cloth if it isn’t actually fouled.
- Don’t go hunting for a wire brush. It’s tempting to scrub the inside of the mag body to get every speck of grit out, but you’ll end up scoring the metal. Scratches on the interior walls lead to friction, and friction leads to failure to feed.
- Check your spring tension while you’re in there. If you’re cleaning the mag because it’s been sitting in a humid garage, take a second to inspect the spring for any signs of corrosion or loss of “oomph.” A clean mag with a weak spring is still a broken mag.
- Dry it completely before you put it back together. I’ve seen people spray down a mag and immediately load it up, trapping moisture inside the casing. That’s a recipe for rust on your brass and a jam when you’re actually on the line.
The Bottom Line on Magazine Maintenance
Stop treating your magazines like disposable plastic; if you’re rough with the feed lips during disassembly, you’re essentially building a malfunction into your next range trip.
Skip the harsh solvents that eat through coatings; a little bit of the right cleaner and a soft brush does more for a follower than a gallon of heavy-duty degreaser ever will.
Cleaning isn’t finished when the grime is gone; it’s finished when you’ve inspected the spring tension and confirmed the follower moves freely without any hesitation.
The Final Check
At the end of the day, cleaning a magazine isn’t about making it look pretty for a photo; it’s about ensuring that when you’re under pressure, the metal does exactly what it’s supposed to do. You’ve learned how to take it apart without bending those feed lips, how to clear out the carbon without stripping the finish, and how to inspect the spring for fatigue. If you’ve followed these steps, you haven’t just cleaned a piece of hardware; you’ve performed a critical maintenance cycle that prevents the kind of malfunctions that turn a good session into a frustrating one. Remember, the goal is to remove the grit while leaving the integrity of the component completely untouched.
I’ve spent twenty years on the line watching people blame their gear for misses that were actually caused by poor maintenance. It’s easy to get caught up in the excitement of a new optic or a high-end trigger, but the real mark of a disciplined shooter is what they do in the quiet moments at the workbench. Take the time to do the unglamorous work properly. When you treat your equipment with that level of respect, you aren’t just maintaining a tool; you are cultivating a habit of reliability that will serve you every single time you step onto the range. Get the small things right, and the shooting will take care of itself.
Frequently Asked Questions
Is it actually worth the time to clean a magazine, or am I better off just buying a new one if it starts acting up?
Look, I’ve seen guys toss perfectly good mags because of a little grit, and I’ve seen guys lose a match because they bought cheap, new ones that couldn’t feed a round to save their lives. If it’s just a matter of carbon or grit, clean it. If the feed lips are bent or the spring is shot, replace it. Don’t gamble on a part that’s fundamentally broken. Clean the reliable ones; replace the junk.
Can I use a standard CLP or bore solvent on the internals, or is that going to gum up the spring over time?
Keep the CLP away from the spring and the follower. I’ve seen too many folks douse the internals in oil, only to have that gunk turn into a sticky paste that catches the spring halfway through a cycle. Use a dry cloth or a quick wipe of a solvent to get the carbon off, but leave the lubrication for the exterior or the slide rails. If it’s wet inside, it’s going to gum up.
How often should I be checking the tension on the feed lips after I've taken them apart for cleaning?
You should be checking that tension every single time you put it back together. Don’t wait for a malfunction to find out you’ve bent a lip or lost the spring’s bite. Once you’ve cleaned the components, reassemble them and do a quick visual and tactile check. If you’re using a magazine tester or even just a dummy round, use it. If the tension feels off or looks uneven, don’t just hope for the best. Fix it now.




