
I was out in the high desert about ten years ago when a guy I’d known for years had his bolt seize up right as the light was failing. He’d been so focused on the shot that he completely ignored the grit working its way into the action all afternoon. Most folks think that learning how to clean a firearm in the field is just about having a little bottle of oil and a rag, but that’s a dangerous way to look at it. Real field maintenance isn’t about making things shine; it’s about preventing a mechanical failure when you’re miles from the nearest paved road.
In this guide, I’m going to skip the fluff and the fancy kit lists you see in those glossy magazines. I want to show you the actual, unglamorous habits that matter when you’re working with limited resources and a ticking clock. We’ll cover how to identify the specific debris that causes jams, how to manage your cleaning supplies without making a mess of your gear, and the essential checks you need to perform before you even think about reassembling. Get these habits down now, and your gear will work when it actually counts.
Guide Overview
Tools & Supplies
- Cleaning rod or multi-tool for reaching barrel internals
- Bore brush to scrub fouling from the rifling
- Patch holder or jag to push cleaning supplies through the bore
- Gun oil or CLP (Cleaner, Lubricant, Preservative) 1 small bottle
- Cotton patches 10-15 pieces
- Microfiber cloth 1 small piece
Step-by-Step Instructions
- 1. First thing’s first, you need to find a flat, stable surface and clear a workspace that is away from any dust or loose dirt. Before you even touch a cleaning rod, you must verify the firearm is empty by opening the action and physically checking the chamber and the magazine well. I’ve seen people get so focused on the grit in the barrel that they forget the most basic rule, and that’s how mistakes happen.
- 2. Once you know you’re working with a cold, empty piece of steel, grab your cleaning kit and start by brushing out the loose debris. Use a nylon brush to sweep the action and the receiver, making sure you’re pushing the dirt away from the internal components rather than packing it deeper into the crevices. If you’re out in the brush or on a dusty trail, this step is what prevents a tiny grain of sand from turning into a major malfunction later.
- 3. Next, you’ll want to address the bore, but don’t go overboard with heavy solvents if you aren’t planning on a deep soak. Run a dry patch through the barrel first to see what kind of buildup you’re actually dealing with, then use a single, lightly dampened patch to wipe away the residue. You aren’t looking for a mirror finish right now; you’re just looking to ensure there isn’t a layer of carbon or grit that’s going to cause a pressure spike or a jam.
- 4. After the bore is clear, take a clean cloth and wipe down the exterior of the firearm, specifically the slide or the bolt assembly and the rails. You want to remove any sweat, oils, or environmental moisture that can lead to surface rust while you’re still out in the elements. It’s a small habit, but preventing oxidation in the field is much easier than trying to scrub a pitted barrel once you get home.
- 5. Now, apply a very light coat of oil to a clean rag and run it over the moving parts—the bolt carrier, the slide, or the action surfaces. The goal here is minimal lubrication; you don’t want a film of oil so thick that it actually attracts more dust and sand from the environment. You just want enough to keep the metal moving smoothly against itself.
- 6. Finally, do a full function check to make sure everything is moving exactly as it should. Cycle the action a few times, check that the safety engages and disengages properly, and once more, double-check that chamber is empty before you even think about putting the firearm back in its case or holster. It’s the last thing you do, and it’s the most important thing you’ll do all day.
Building Your Essential Field Cleaning Kit
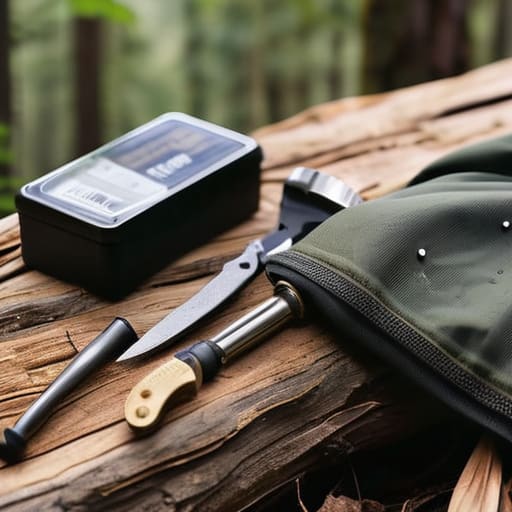
You don’t need a heavy, organized tackle box to handle an essential field cleaning kit, but you do need to be intentional. I’ve seen too many folks try to improvise with a twig and some motor oil, and that’s a quick way to turn a minor grit issue into a permanent scratch. I keep mine in a small, waterproof dry bag. It’s got the basics: a high-quality bore brush, a few cotton patches, a small bottle of solvent, and a decent multi-tool. If you’re out in the brush, weight matters, but don’t sacrifice the tools that actually do the work.
When you’re dealing with firearm maintenance in harsh environments, your biggest enemy isn’t just the dirt; it’s the moisture trapped in the crevices. I always make sure to pack a small rag specifically for wiping down the exterior metal. If you skip that step, you’re essentially inviting oxidation to set in before you even get home. It isn’t about making the rifle look pretty for the folks at the club; it’s about preventing rust in the wild so the action actually cycles when you need it to.
Removing Carbon Buildup Outdoors Before It Sets

When you’re out in the elements, carbon isn’t just a nuisance; it’s a magnet for moisture. If you let that black soot sit in the bolt group or around the gas port, it acts like a sponge for humidity. I’ve seen too many folks finish a long day of hunting, toss their rifle in a soft case, and head home, only to find a layer of grit turned into a corrosive paste by morning. You need to focus on removing carbon buildup outdoors while the residue is still relatively soft and hasn’t baked into a hard crust.
Don’t feel like you need to perform a full strip-down in the middle of the woods. The goal here is preventative maintenance. Use a stiff nylon brush from your essential field cleaning kit to knock the loose chunks out of the action and around the breech face. If you’re dealing with a semi-auto, pay extra attention to the bolt carrier group. Getting that initial layer of grime off now is the difference between a smooth cycle tomorrow and a jam when you’re actually tracking something.
Five Habits to Keep the Grit Out of Your Action
- Control your environment before you start; never lay your parts down directly on dirt or grass, even if it’s just for a second. Use a clean rag, a dedicated mat, or even the inside of your jacket to create a staging area so you aren’t just trading carbon for sand.
- Don’t over-oil in the field. I’ve seen too many folks think a little extra lubricant helps with the grit, but all you’re doing is creating a magnet for dust that turns into a grinding paste inside your action. A light wipe is plenty.
- Check your eyes and your hands constantly. If you’re working on your kit and you wipe sweat out of your eyes with a hand that’s been handling CLP or carbon, you’re going to have a bad time. Wash up or use a wipe before you touch your face.
- Keep your brass separate from your cleaning supplies. You don’t want a stray bit of solvent or a cleaning patch getting mixed in with your live rounds in your pouch. Keep the dirty work in one spot and the ammunition in another.
- Perform a function check every single time you put it back together. Don’t just assume it’s good because you think you seated the bolt correctly. Cycle it, check the safety, and make sure the mechanics are doing exactly what they’re supposed to do before you pack it away.
The Three Habits to Carry Home
Don’t let a little grit turn into a permanent problem; clearing out the carbon and debris while you’re still in the field is what prevents a malfunction when you’re actually relying on that tool.
Your field kit doesn’t need to be a professional armorer’s bench, but it does need to be purposeful—if you’re carrying something you don’t know how to use, leave it in the truck.
Remember that field cleaning is about maintenance, not perfection; you aren’t looking for a showroom shine, you’re looking to ensure the mechanics of the firearm remain reliable until you can get it back to your workbench.
The Long View on Field Maintenance
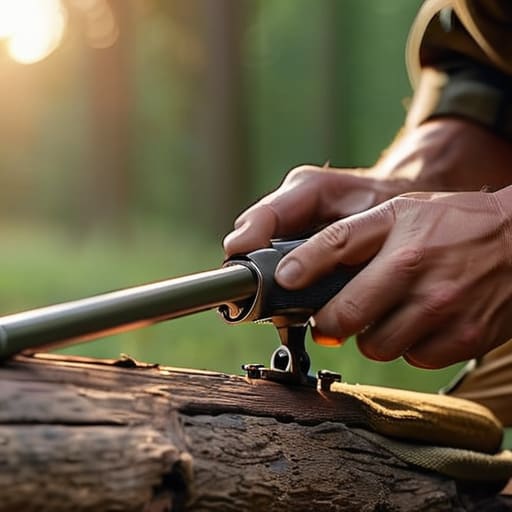
At the end of the day, field cleaning isn’t about making your rifle look pretty for a photo; it’s about the mechanical reality of what happens when grit meets moving parts. You’ve got your kit ready, you’ve cleared the carbon before it baked into the steel, and you’ve addressed the debris that would otherwise cause a malfunction mid-string. If you follow these steps—keeping your tools organized and your movements deliberate—you aren’t just cleaning a tool, you are maintaining the reliability of your equipment. It’s those small, unglamorous habits, like checking your bore before stowing your gear, that separate a prepared shooter from someone just hoping for the best.
I’ve spent twenty years on the line watching people rush through their post-shoot routine, only to find their gear failing them when they need it most. The sport is easy enough when the sun is out and the targets are clear, but the real test comes when things get messy. Treat your maintenance with the same disciplined respect you give your trigger squeeze. If you take care of the unglamorous half of this sport now, the shooting part will take care of itself every single time you step up to the line.
Frequently Asked Questions
If I don't have a full cleaning kit with me, what’s the bare minimum I can do to keep the action from seizing up?
If you’re stripped down to nothing, your priority is grit. If you can’t scrub, you can at least clear. Grab a clean, lint-free rag—even a cotton undershirt works if you’re desperate—and wipe every bit of loose powder and debris out of the action. If you have a drop of oil, use it to break up the sludge. It’s better to have a slightly dirty gun that cycles than a clean one that’s stuck solid.
Is it actually safe to use a little bit of CLP or oil on the bolt if I’m worried about attracting dust and grit in the field?
I’ve seen plenty of folks over-oil their bolts in the dirt, and it usually ends with a jam when they need the gun most. If you’re out in the grit, less is more. Use just enough to keep the metal from feeling dry, but don’t let it pool. A light wipe with a rag is better than a soak. You want a film, not a magnet for every piece of sand in the county.
How much of a problem is it if I can't get the bore completely clean until I get back home to my workbench?
It isn’t the end of the world, but it is a habit you shouldn’t get comfortable with. If you can’t get the bore spotless in the field, that’s fine—just don’t let that grit sit. Carbon and fouling act like a sponge for moisture and salt. If you leave it dirty, you’re just inviting corrosion to start its work while you’re sleeping. Get the bulk out now, run a dry patch, and get it back in the case.




