
I watched a guy last Saturday try to scrub carbon out of a trigger group using nothing but a toothbrush and a prayer, scrubbing harder and harder until he nearly snapped a pin. Most folks think that knowing how to detail strip for cleaning is just about taking things apart, but the truth is, it’s actually about knowing how to put them back together without losing your mind or a vital spring. I’ve spent twenty years on the range seeing people treat their gear like it’s indestructible, only to have a piece of grit turn a reliable tool into a paperweight the moment they actually need it.
In this guide, I’m going to walk you through the actual, unglamorous process of getting deep inside your firearm. I won’t give you any fancy, high-speed shortcuts that end in broken parts; instead, we’re going to focus on the proper sequence and the right tools to ensure you aren’t just moving dirt around. We’ll cover how to organize your workspace, how to identify those tiny, easy-to-lose components, and the specific steps for mastering the disassembly so that your maintenance becomes a habit, not a headache.
Guide Overview
Tools & Supplies
- Screwdriver set (various sizes for specific fasteners)
- Small mallet (for gentle component separation)
- Needle-nose pliers (for retrieving small parts)
- Magnetic tray (to organize small screws and pins)
- Cleaning solvent (enough for soaking parts)
- Lint-free cloths (3-5 pieces)
- Degreaser (1 small bottle)
- Lubricant (1 small tube)
Step-by-Step Instructions
- 1. Before you even touch a screwdriver, you need to clear the weapon. I don’t care if you just pulled it from the safe; you perform a physical and visual inspection of the chamber and the magazine well. I’ve seen too many people start a teardown with a round still sitting in the feed ramp because they were in a hurry. Remove the magazine, lock the slide or bolt back, and look inside with your own eyes.
- 2. Lay out your workspace. You aren’t working on a kitchen table or a piece of cardboard; get a dedicated parts tray or even just a clean, light-colored rag. When you start pulling pins and springs, those tiny components tend to disappear into the carpet like they’re being hunted. Having a designated “landing zone” for every screw and spring is the difference between a successful cleaning and a trip to the gun shop to find a lost firing pin.
- 3. Start with the field strip to get the heavy carbon off the major moving parts. Take out the slide, the barrel, and the recoil spring assembly. This is the part most people stop at, but if we’re talking about a real detail strip, we aren’t stopping here. Use a nylon brush to get the loose grit off the exterior, but don’t start scrubbing the internal rails with heavy solvents just yet; you want to save the deep cleaning for when the parts are actually separated.
- 4. Now, move into the frame. Depending on what you’re working on, this usually means driving out your pins. If you’re working on a striker-fired pistol, you’ll be removing the backplate to get to the striker assembly. Use a punch that actually fits the pin—don’t force a tool that’s too small, or you’ll mar the finish and create a permanent scar. If a pin feels stuck, don’t hammer it like a madman; tap it with a steady, rhythmic pressure until it moves.
- 5. Once the frame is open, separate the trigger group and the sear components. This is where the “unseen work” happens. You’re looking for the tiny pockets of dried oil and carbon buildup that hide behind the trigger bar or inside the housing. Use a specialized cleaning pick or a stiff nylon brush to clear those out. You want to see bright, clean metal in every corner of that housing before you even think about applying new lubricant.
- 6. Lay everything out in the exact order you took it apart. I tell people this all the time: if you don’t have a mental or physical map of how the parts fit together, you’re going to have a “mystery spring” left over when you try to reassemble. Group your parts by subsystem—trigger components here, slide components there, frame pins over there. It makes the reassembly process procedural rather than guesswork.
- 7. Before you put the first pin back in, wipe every single component down with a clean, lint-free cloth. You aren’t just removing dirt; you’re removing the old, gummy oil that has turned into a magnet for grit. You want to start the reassembly with a fresh, thin layer of high-quality lubricant, not a slurry of old grease and carbon. If the metal isn’t pristine, you’re just putting the filth right back where it started.
Removing Old Wax Buildup With Precision
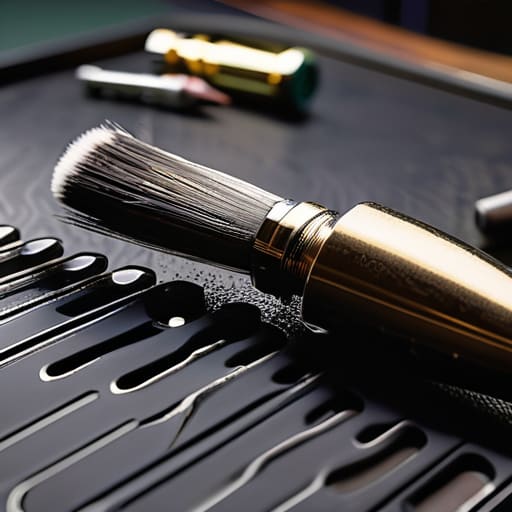
Once you have the components laid out on your bench, you’re going to notice things that a simple wipe-down with a rag never touches. I’m talking about that stubborn, gummy residue tucked into the tight corners of the frame or the underside of the slide. In my shop, I treat this like a paint decontamination process on a classic car; you can’t just scrub harder, or you’ll mar the finish. If you try to force a stiff brush through a thick layer of old grease and carbon, you aren’t cleaning—you’re just rearranging the mess.
The trick is patience and the right solvent. I’ve seen folks try to use harsh, abrasive cleaners that end up eating into the blueing, which is a mistake you only make once. Think of it like choosing between a clay bar vs chemical stripping approach on a vehicle; sometimes you need the chemical to do the heavy lifting so you don’t scratch the surface. Use a dedicated degreaser and let it sit. Let the chemistry work on the gunk while you prep your next station. Wait for the solvent to do its job, and then use a soft nylon brush to lift the slurry away.
Clay Bar vs Chemical Stripping the Right Choice
Now, when you’re dealing with that stubborn, old residue, you’re going to run into the classic debate: clay bar vs chemical stripping. In my shop, I treat this like any other precision task. If you’ve got a light layer of grit or environmental fallout, a clay bar is a fine, controlled way to smooth things out. It’s tactile, you can feel the surface changing under your hands, and it doesn’t involve harsh solvents. But you have to be careful; if you press too hard or use a bar that’s too aggressive, you’re just introducing new problems.
If you’re facing heavy, baked-on gunk, though, you need to move toward a more aggressive approach. That’s where your choice of solvents comes into play. Using a dedicated chemical agent is often more efficient for removing old wax buildup that has become part of the surface texture. I’ve seen folks try to scrub their way through a problem when they should have been dissolving it. My rule is simple: use the least aggressive method that actually gets the job done. If the chemical doesn’t lift it, don’t just keep scrubbing until you mar the finish—stop and reassess.
Five Things Most People Miss When They Open Up a Firearm
- Organize your workspace before you pull the first pin. I’ve seen too many folks lose a tiny detent spring to a shag carpet because they tried to work on a cluttered workbench. Use a magnetic tray or a clean, white cloth so you can actually see what you’re doing.
- Respect the spring tension. When you’re pushing out a pin or releasing a striker, don’t just let it fly. Control the movement. If you let a spring launch itself across the room, you aren’t just losing time; you’re losing the rhythm of a methodical job.
- Don’t force it. If a part isn’t moving, something is wrong. In my machining days, we learned that if you have to muscle a component, you’re either stripping threads or bending something that’s meant to be straight. Stop, look for debris, and re-evaluate.
- Keep a dedicated parts tray for the small stuff. I don’t care how simple the assembly seems; those tiny washers and pins have a way of looking identical once they’re out of their housing. Group them by sub-assembly so you aren’t guessing during reassembly.
- Document the “feel” of the parts. As you take things apart, notice how they interact. If a piece feels gritty or a spring feels weaker than it should, write it down. Cleaning is the perfect time to catch a mechanical failure before it turns into a range incident.
The Essentials of a Clean Build
Don’t rush the disassembly; if you force a pin or a screw, you aren’t cleaning a tool, you’re breaking it.
Choose your method based on the mess, not the convenience—use the clay bar for surface grit, but don’t be afraid of the chemicals when the old wax is baked in.
The goal isn’t just to make it look shiny; it’s to ensure that when you’re out on the line, the only thing you’re thinking about is your trigger press, not a jammed action.
The Work is the Reward
At the end of the day, whether you chose the clay bar for those stubborn spots or went with a chemical soak, the goal remains the same: getting into the corners where the grit hides. You’ve gone through the pins, the springs, and the tiny crevices that most people ignore because they’re too impatient to get their hands dirty. Remember that precision matters when you’re putting it back together just as much as when you’re taking it apart. If you skip a single spring or force a pin that isn’t seated, you aren’t just being messy—you’re creating a mechanical failure. Take your time, keep your parts organized, and make sure every surface is truly clean before that first drop of oil goes back on.
I’ve spent twenty years watching people rush through this part of the process, only to wonder why their gear fails them when they finally step onto the line. A firearm isn’t just a tool; it’s a mechanical system that demands respect through maintenance. When you master the detail strip, you stop being someone who just “owns” a gun and start being someone who understands it. That discipline is what separates the hobbyists from the marksmen. Do the unglamorous work now, and your equipment will reward you with absolute reliability every single time you pull the trigger.
Frequently Asked Questions
How do I know if I'm about to snap a pin or strip a screw that's been stuck for years?
You’ll feel it in your hands before you see it with your eyes. If you’re applying steady, even pressure and the tool isn’t budging, stop. If you feel a sudden, “mushy” give, you’ve likely rounded the screw head or started to bend the pin. That’s your signal to back off. Don’t try to muscle it through. If it doesn’t move with reasonable effort, it needs heat or a penetrating oil, not more muscle.
Do I really need to take every single part out, or can I just focus on the high-friction areas?
You can focus on high-friction areas if you’re in a rush, but you aren’t really cleaning it then—you’re just tidying up. If you leave the grit trapped in the corners of the frame or under a pin, that’s exactly what’s going to cause a malfunction later. I’ve seen too many people skip the deep work only to have a piece of carbon act like sandpaper on a polished surface. Strip it. Do it right once.
What’s the best way to keep track of all these tiny springs and pins so I don't end up with a pile of useless scrap?
Don’t just toss them on a workbench. I’ve seen too many guys staring at a pile of parts wondering which spring goes where. Get yourself a magnetic parts tray—it’s cheap and it works. If you’re working on something really small, use a divided machinist’s tray or even an old ice cube tray. Lay them out in the same order you took them out. If you can’t see the order, you aren’t ready to reassemble.




