
I watched a guy last Saturday spend four hundred dollars on a high-end red dot, only to spend the next three months chasing a zero that wouldn’t stay put. He kept blaming the glass, the ammo, and even his own grip, but the truth was much simpler: he’d rushed the milling process. Most folks think that learning how to adapt a slide for an optic is just about finding a shop or buying a cheap plate, but that’s a mistake that’ll cost you more than just money. If you don’t respect the machining tolerances and the prep work involved, you aren’t building a tool; you’re building a headache.
In this guide, I’m going to walk you through the actual mechanics of the job, from choosing the right milling method to ensuring your mounting surface is dead flat. I’m not here to sell you on fancy gadgets or tell you that any old screw will do the trick. We’re going to focus on the proper sequence—the cleaning, the deburring, and the precise measurements—that ensures your optic stays exactly where you put it. Get the foundation right, and the shooting takes care of itself.
Guide Overview
Tools & Supplies
- Milling Machine or CNC Router (to remove metal for the optic footprint)
- Deburring Tool (to smooth edges of the cut area)
- Calipers (to ensure precise measurements and depth)
- Optic-Ready Slide (pre-milled or standard slide)
- Mounting Screws (specific to your optic model)
- Loctite 243 (threadlocker to prevent screw loosening)
Step-by-Step Instructions
- 1. First thing you need to do is get that slide onto a proper milling jig. Don’t try to freehand this or use some cheap plastic guide that wobbles; if your angle is off by even a hair, you’re going to spend the rest of the afternoon fighting a losing battle with your zero. You want a heavy, stable setup that holds the steel exactly where it needs to be.
- 2. Once it’s clamped down, you have to clean the surface until it’s spotless. I’ve seen guys try to mill right over old oil or carbon buildup, and that’s a recipe for a ruined slide. Use a good degreaser and wipe it down until you can see your reflection, because any stubborn grit left behind will chew up your end mill faster than you can say “oops.
- 3. Now, you need to select your cutter. Don’t just grab the biggest bit in the tray thinking more metal removal is better. You want a small diameter end mill that can actually fit into the tight corners of your optic footprint. If you use a bit that’s too wide, you won’t get those clean, sharp corners that keep the optic seated flat.
- 4. Start your cuts slow. I’m talking real slow. You aren’t trying to win a race; you’re trying to remove material precisely. Set your depth of cut shallow—maybe only a couple of thousandths at a time—and let the machine do the work. If you try to force the depth in one go, you’re going to chatter, and chatter means a surface that looks like a plowed field.
- 5. While you’re milling, keep a close eye on your chip evacuation. If those little curls of steel start piling up in the cut, they’ll get caught under the bit and mar the finish. Use compressed air or a brush to keep the work area clear. You want to see the metal coming off in consistent, predictable curls, not a messy pile of shavings that’s clogging up your progress.
- 6. After you’ve reached your final depth, don’t just pull the slide off and call it a day. You need to do a final pass with a very light touch to smooth out any tool marks. This is what separates the guys who do it right from the guys who just “get it done.” A smooth, flat surface is what ensures your optic stays true when you’re actually out on the line.
- 7. The last step is the one most people skip: the deburring. Take a fine stone or a deburring tool and run it along every single edge you just created. You don’t want any sharp burrs catching on your optic mounting screws or your hands. Once it’s smooth to the touch, give it one last thorough cleaning, and then you’re actually ready to mount that red dot.
Precision Milling Why Slide Machining Precision Rules Everything
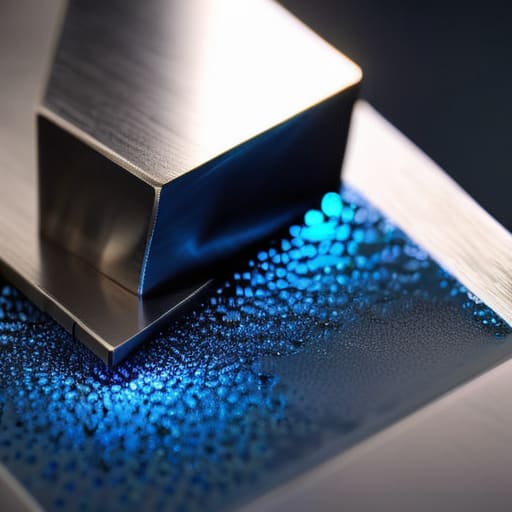
Now, I’ve seen folks try to rush this part, thinking they can just eyeball the placement and call it a day. That’s a mistake you only make once. When you’re milling a slide for a red dot, you aren’t just cutting a hole; you are creating a foundation. If your slide machining precision is off by even a few thousandths, you’re going to spend the next six months fighting a zero that refuses to stay put. It doesn’t matter how expensive your glass is if the metal underneath it is crooked.
You also need to pay close attention to your sight cut depth and tolerance. If you go too shallow, the optic sits high and you lose your co-witness; if you go too deep, you’re compromising the structural integrity of the slide itself. I always tell my students to treat the machining process like a machinist treats a blueprint: measure twice, cut once, and never settle for “close enough.” If the footprint isn’t dead-on, the optic is just a heavy piece of plastic riding on a shaky platform.
Managing Sight Cut Depth and Tolerance for a Reliable Zero
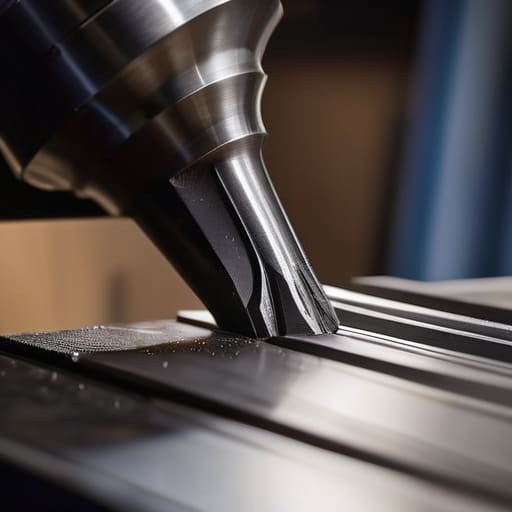
When you’re milling a slide for a red dot, it’s easy to get caught up in the width of the cut, but the depth is where most people trip up. If you go too shallow, you’re left with a mounting footprint that doesn’t sit flush, and you’ll spend your whole afternoon chasing a zero that won’t stay put. On the flip side, if you’re too aggressive with the depth, you risk thinning out the slide too much or even compromising the structural integrity of the steel. You have to find that sweet spot where the optic sits dead level against the surface.
I’ve seen plenty of guys rush this part because they think a little extra material won’t hurt. It will. If your sight cut depth and tolerance are off by even a few thousandths, you aren’t just dealing with a slight shift; you’re dealing with an optic that can wobble under recoil. I always tell people to check their measurements twice and cut once. It’s better to spend an extra twenty minutes verifying your depth with a micrometer than to spend three months wondering why your reflex sight compatibility seems to vanish every time you hit the range.
Five Things Most Guys Forget Before They Hit the Mill
- Check your screw length twice. I’ve seen too many shooters ruin a perfectly good optic because they didn’t realize a fraction of a millimeter too much thread was digging into the optic’s internal housing. If it’s too long, you’re not just losing money; you’re losing reliability.
- Don’t skip the deburring. If you leave even a tiny bit of metal flashing around that sight cut, your optic won’t sit flat. If it isn’t flat, it isn’t zeroed, and you’ll be chasing your tail at the range for three months.
- Mind your screw hole placement. You can’t just drill wherever it looks easy. You have to account for the internal geometry of the slide—if you drill into a critical stress point or a channel, you’ve turned a precision tool into a paperweight.
- Clean the cut like your life depends on it. I’m serious. Any tiny shard of steel left in those milled grooves will act like a shim, tilting your optic just enough to throw your point of impact off. Use compressed air and a brush until that slide looks like it’s never seen a chip.
- Use the right thread locker, but don’t go overboard. A tiny drop of blue Loctite is what keeps those screws from walking out under recoil, but if you go heavy on the red or use too much, you’re going to have a real hard time adjusting that optic when you actually need to.
The Bottom Line on Slide Prep
Don’t cut corners on the milling depth; if your sight cut is too shallow, you’re looking at a permanent headache with your zero, and if it’s too deep, you’ve ruined the slide.
Treat the surface prep as seriously as the cut itself—an optic is only as stable as the metal it’s sitting on, so clean that mounting surface properly or don’t bother.
Remember that precision isn’t a luxury in machining; it’s the difference between a reliable tool and a piece of scrap metal that won’t hold its point of aim.
The Final Check

At the end of the day, adapting a slide isn’t just about cutting a hole in a piece of steel; it’s about managing the math and the physics of your firearm. You’ve got to respect the milling depth, ensure your tolerances allow for a rock-solid mounting surface, and never, ever rush the prep work. If you skip the cleaning or ignore the precision required in the cut, you aren’t just wasting money—you’re creating a tool that will fail you when it matters most. Whether you’re doing the machining yourself or sending it out to a shop, remember that the quality of that interface is the only thing standing between a reliable zero and a very expensive paperweight.
I’ve spent twenty years on the range watching people chase every new piece of gear on the market, but the most successful shooters I know are the ones who prioritize the fundamentals of maintenance. An optic is only as good as the slide it sits on. Don’t treat this as a cosmetic upgrade; treat it as a mechanical integration. Take your time, do the work properly, and respect the process. If you get the unglamorous stuff right—the cleaning, the measurements, and the precision—the actual shooting will take care of itself.
Frequently Asked Questions
If I'm milling this myself, how do I know if I've taken too much material off the top of the slide without compromising the structural integrity?
Look, if you’re machining your own gear, you’re already playing a different game than most. You aren’t just cutting metal; you’re managing stress. I always tell folks to watch the thickness of the remaining deck. If you’ve milled it down so thin that the slide feels light or looks like a wafer, you’ve gone too far. You need enough meat left to handle the slide’s cycling forces without cracking under recoil. Don’t get greedy with the depth.
Do I need to worry about the screw length hitting the barrel, or is there a standard clearance I should be looking for?
You absolutely need to worry about it. I’ve seen enough people turn a perfectly good barrel into a paperweight because they were too lazy to measure. There isn’t one universal “standard” because every optic and slide combo is different. You need to check your clearance every single time you change a screw. If that screw touches the rifling, you aren’t just ruining your accuracy; you’re potentially causing a catastrophic failure. Measure twice, screw once.
Once the cut is done, is it better to run a deburring tool over the edges, or will the recoil just smooth things out over time?
You run a deburring tool over those edges. Every single time. Don’t count on recoil to do your job for you; recoil doesn’t “smooth things out,” it just creates micro-cracks and vibration issues you don’t want. If you leave a sharp burr, that’s a stress riser waiting to happen, or worse, a snag point for your optic’s mounting screws. Clean, smooth edges aren’t about aesthetics; they’re about making sure the hardware stays seated exactly where you put it.




