I’ve sat on the range line for twenty years, and if there’s one thing I’ve learned, it’s that people love to spend a thousand dollars on optics but won’t spend ten minutes learning how to inspect springs for wear. I once watched a guy at the club spend an entire afternoon cursing a “jamming” semi-auto, only to realize his recoil spring had lost its tension months ago. He was looking for a complex mechanical failure when the truth was sitting right there in plain sight, just tired and worn out. Most folks think you need a micrometer or a lab to tell if a spring is shot, but that’s just more expensive nonsense that keeps you from actually understanding your gear.
I’m not here to sell you a fancy diagnostic kit or a textbook full of jargon. I’m going to show you the practical, unglamorous ways to tell when your springs are reaching their limit using nothing but your hands, your eyes, and a little bit of common sense. We’re going to talk about the real indicators—the subtle changes in tension and the visual tells that most people miss—so you can catch a failure in your workshop rather than discovering it during a malfunction on the line.
Spotting the Signs of Spring Fatigue Early
You aren’t going to see a spring snap in half like a dry twig most of the time. Usually, it’s a slow slide into unreliability. I tell folks to look for the subtle shifts in how the action feels. If your recoil spring feels “mushy” or isn’t returning the slide with that same crisp, snappy authority it had a year ago, you’re looking at the first of the mechanical spring failure symptoms. You might also notice your ejection pattern getting erratic or your brass landing in the same spot every single time—that’s often the physics of a weakened spring telling you it’s tired.
Next, get a bright light and look closely at the coils themselves. I’m looking for more than just surface dust; I’m looking for pitting or discoloration. Detecting corrosion on coils is vital because once the surface of the metal is compromised, the structural integrity of the whole component is shot. If you see tiny cracks or a change in the metal’s texture, don’t try to “limp it home” through a long range session. That’s when the real trouble starts.
Detecting Corrosion on Coils Before It Bites
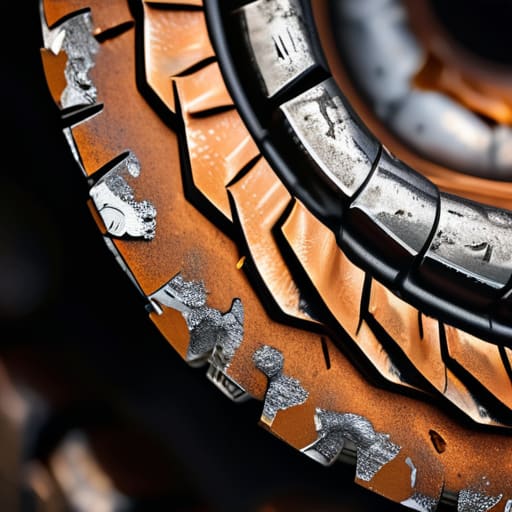
Most people think a little surface rust is just an aesthetic issue, something you can wipe away with an oily rag and call a day. But if you’re looking at a spring, you have to look deeper than the shine. When you’re detecting corrosion on coils, you aren’t just looking for color changes; you’re looking for pitting. If that rust has actually eaten into the metal, it has created microscopic stress risers. Those little pits act like tiny notches that invite a crack to start growing every time the spring compresses. Once that happens, the structural integrity of metal springs is compromised, and you’re essentially holding a ticking clock in your firearm.
I’ve seen too many folks ignore a dull or discolored spring because it still “feels” fine. Don’t fall for that. If you see any sign of scaling or deep discoloration, stop. That’s one of those mechanical spring failure symptoms that you can’t just clean your way out of. If the metal has lost its smooth, consistent surface, it’s lost its ability to handle the load. At that point, the only real fix is a replacement. It’s a cheap part compared to the cost of a malfunction at the range.
Five Ways to Tell if Your Springs are Giving Up
- Don’t just look at them; feel them. If you’re checking a recoil spring, compress it slowly and feel for any “stutter” or uneven resistance. A good spring should feel smooth and consistent from start to finish; any grit or hesitation in the movement tells me there’s a microscopic kink or a buildup of gunk that’s going to cause a malfunction later.
- Watch your timing. If you’ve noticed your slide is cycling a little too fast, or maybe it’s not coming all the way back into battery like it used to, stop blaming the ammo. Most of the time, it’s just a spring that’s lost its tension and is no longer doing the heavy lifting it was designed to do.
- Check the “set” of the spring. Take a look at the overall length of the spring when it’s uncompressed. If it looks even a hair shorter than the factory specs or the last time you measured it, that metal has fatigued. It’s lost its memory, and once a spring loses its shape, you can’t just wish it back into compliance.
- Inspect the ends for “mushrooming.” Look closely at where the coil meets the guide rod or the housing. If the very last coil looks flattened, flared, or slightly deformed, that’s a sign of excessive stress. That’s where the failure starts, and it’s usually where the spring will eventually snap.
- Use a magnifying glass for the small stuff. You might think a spring looks fine from a foot away, but I want you to get up close and look for tiny cracks or “stress whitening” in the metal. If you see any irregularities in the coil diameter—places where it looks thinner or wider than the rest—that spring is done. Replace it before it decides to fail while you’re actually on the line.
The Bottom Line on Spring Maintenance
Don’t wait for a failure at the range to tell you something is wrong; if a spring feels “mushy” or lacks that crisp snap during your bench checks, it’s already past its prime.
Keep a close eye on the finish of your coils, because once you see that tiny speck of rust, the structural integrity of the metal is already being compromised.
Make the boring stuff—the regular, unglamorous inspections—a non-negotiable habit, because a spring failing mid-cycle is a malfunction you don’t want to troubleshoot while the timer is running.
The Cost of Neglect
At the end of the day, inspecting your springs isn’t some high-level tactical skill; it’s just good housekeeping. You’re looking for that subtle loss of tension, those tiny flecks of rust that start in the coils, and any visible deformation that tells you the metal is tired. If you can spot the fatigue and the corrosion before they hit the firing line, you’ve already won half the battle. Don’t let a five-dollar piece of steel be the reason your entire weekend goes sideways because you were too busy looking at your groupings to look at your hardware. The boring stuff is what keeps you safe, and it’s a lot easier to swap a spring in your workshop than it is to deal with a malfunction when you’re under pressure.
I’ve seen enough people rush through their maintenance only to realize they ignored the very things that keep their equipment reliable. Shooting is a discipline that starts long before you pull the trigger; it starts when you open your range bag and actually look at what you’re carrying. When you commit to these small, unglamorous checks, you aren’t just maintaining a tool—you’re respecting the sport and the people standing next to you on the line. Get your habits right, check your springs, and the shooting will take care of itself.
Frequently Asked Questions
How do I know if a spring is actually "worn out" versus just feeling a bit sluggish?
It’s a fine line. “Sluggish” is usually just a lack of oil or a bit of grit in the coil. If it feels slow but returns to position consistently, clean it and move on. But if the reset is inconsistent, or if the spring doesn’t feel like it’s pushing back with the same snap it had a year ago, that’s fatigue. If you have to “help” the mechanism finish its cycle, the spring is done.
Is there a specific way to test the tension of a recoil spring without a specialized gauge?
You don’t need a fancy gauge to tell if a recoil spring is tired. I usually tell folks to just use their hands and a bit of intuition. Take the spring out and compress it manually. It should feel consistent and smooth all the way through. If you hit a “soft spot” or it feels mushy halfway through the stroke, that spring is done. It’s not scientific, but it’ll tell you enough to keep you shooting safely.
If I find a bit of surface rust on a coil, is that a reason to toss the spring or can I clean it?
If it’s just a light dusting of surface rust, don’t go tossing it in the scrap bin just yet. Get some solvent and a stiff nylon brush, and clean it thoroughly. Once it’s clear, inspect the metal closely. If the rust has actually eaten into the coil—meaning you see pitting or the diameter of the wire looks uneven—that spring is compromised. At that point, it’s no longer reliable. Replace it. Better to spend twenty bucks now than deal with a malfunction later.




