
Most folks think learning how to shoot steel targets is all about chasing that satisfying ping and dialing in your grouping. They spend all their time staring through a scope, obsessing over windage and elevation, while completely ignoring the most important part of the equation. I’ve stood on the line for twenty years, and I’ve seen plenty of shooters get so caught up in the thrill of the impact that they forget they’re working with high-velocity projectiles and heavy metal. If you aren’t accounting for your backstop and your distance before you even chamber a round, you aren’t really practicing; you’re just hoping for the best.
In this guide, I’m going to skip the flashy nonsense and get straight to the mechanics of doing it right. We’ll walk through the proper setup, how to manage your distance to prevent ricochets, and the specific drills that actually build consistent discipline. I want to show you how to turn that “ping” into a tool for improvement rather than just a loud noise. We’re going to focus on the fundamentals of how to shoot steel targets so that when you step up to the line, you’re focused on your skill, not your luck.
Guide Overview
Tools & Supplies
- Hammer or mallet for securing stands
- Level to ensure target stability
- Measuring tape for distance setup
- AR500 steel target (1 unit)
- Steel target stand or tripod (1 unit)
- Heavy-duty clamps or bolts (1 set)
- Protective eye and ear protection (1 set)
Step-by-Step Instructions
- 1. Before you even think about unholstering or opening a case, you need to establish your backstop. I’ve seen plenty of folks get excited about the “ping” of a steel plate and forget that bullets don’t just stop when they miss the target. You need to know exactly what is behind that steel—whether it’s a dedicated berm or a massive earthen mound—and you need to be certain it’s deep enough to catch everything you’re sending downrange.
- 2. Next, you have to set your distance with a bit of respect. I don’t care how fast you think you can pull a trigger; if you are shooting steel at a distance that is too short for your caliber, you’re asking for a fragmentation problem. Check your manufacturer’s minimum distance recommendations for the specific load you’re running. If you’re shooting high-velocity rounds, you need to give that projectile enough room to stabilize before it hits the metal.
- 3. Once you’re set up, perform a visual inspection of your hardware. I want you to look at your mounts, your stands, and the plates themselves. You aren’t looking for scratches; you’re looking for structural fatigue. A cracked bracket or a rusted-out bolt can turn a fun afternoon into a dangerous one if a plate decides to fly off its mount. If the setup looks shaky, don’t shoot it.
- 4. When you actually start the engagement, focus on your rhythm rather than your speed. A lot of new shooters try to “spray and pray” to get that satisfying sound, but that’s how you lose control of your grouping and your safety. Aim for a controlled cadence. You want to hear the steel, confirm the hit, and then reset your sight picture for the next one. Consistency beats volume every single time.
- 5. Keep a close eye on your steel during the lull between shots. You’re looking for signs of “splash” or excessive fragmentation. If you notice the steel is starting to look pitted or if you’re seeing a lot of unusual debris bouncing back toward your position, it’s time to change up your ammunition or move back. The steel tells you how it’s taking the hits; you just have to be quiet enough to listen.
- 6. Finally, when the session is over, don’t just pack up and head for the truck. You need to do a thorough sweep of the area. Check the ground around your targets for any stray projectiles or fragments that might have skipped off the plate. I always tell my students: the job isn’t done when the holster clicks; it’s done when the range is cleaner than when you arrived.
Steel Target Safety Precautions and the Minimum Engagement Distance
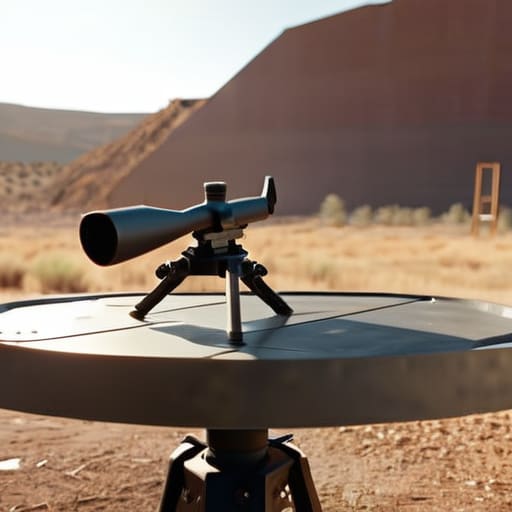
Now, before you start pulling the trigger, we need to talk about the space between you and that metal. I’ve seen too many folks set up a plate ten yards away and wonder why they’re getting peppered with grit. You have to respect the physics of what happens when a projectile hits a hard surface. Establishing a proper minimum engagement distance for steel isn’t a suggestion; it’s the difference between a productive afternoon and a trip to the eye doctor. If you’re shooting with handguns, you can get a bit closer, but when you move up to rifles, that distance needs to increase significantly to account for the energy involved.
Beyond just distance, you need to be mindful of steel target maintenance and inspection. Every few sessions, I take a look at my plates to check for pitting or cracks. If a plate is compromised, it doesn’t just stop ringing true—it becomes unpredictable. Also, keep an eye on your backstop. You aren’t just aiming at the target; you are managing the entire trajectory of that round to ensure nothing goes past the steel and into something it shouldn’t.
Steel Target Maintenance and Inspection the Work Nobody Sees

Most people think the job is done once the brass stops hitting the dirt, but if you’re serious about your gear, the real work starts when the range goes cold. I’ve spent more mornings than I can count looking at targets that were run into the ground because someone thought a piece of metal was indestructible. You need to make it a habit to perform regular steel target maintenance and inspection every single time you pack up. Look for “pitting”—those tiny little craters where the impact is starting to soften the surface. If you see the metal starting to flake or lose its temper, it’s time to retire that plate.
It isn’t just about the steel itself, either; it’s about the hardware holding it up. I’ve seen bolts shear off and stands buckle because a shooter didn’t notice a hairline crack in a bracket. Check your mounting hardware for fatigue and ensure your stands are seated firmly in the ground. If you’re switching between shooting steel targets with handguns vs rifles, pay extra attention to the impact zones. Rifles hit with a much more violent energy that can fatigue a mounting system faster than you’d think. Keep your equipment tight, and it’ll keep you safe.
Five Habits for the Steel Line
- Watch your impact zone. It isn’t enough to know where your target is; you need to know exactly where that fragment or ricochet is headed when it leaves the steel. If you haven’t looked at your backstop in the last five minutes, you aren’t ready to squeeze the trigger.
- Listen to the steel. A healthy “ping” tells you you’re hitting the sweet spot. If you start hearing a dull thud or a weird metallic rattle, stop. You’re either hitting a cracked plate or your mounting hardware is working itself loose, and neither is good for your gear or your safety.
- Don’t chase the “splatter.” I see it all the time—shooters getting so caught up in trying to hit a specific spot to see that nice lead splash that they start rushing their follow-through. Slow down. The steel will still be there after you’ve settled your breathing.
- Check your hardware between strings. Vibration from impact does things to bolts and clamps that you won’t notice until the target is lying in the dirt. Make it a habit to give your stands a quick shake or a visual check every time you reload.
- Respect the reset. If you’re running rapid fire, don’t let your rhythm dictate your safety. If the steel starts behaving erratically or your grouping shifts toward the edge of the plate, take a breath and reset. The goal is precision, not just seeing how fast you can make noise.
The Three Things You Take Home From the Line
Distance is your first line of defense; never compromise on that minimum engagement gap just because you want a bigger splash.
Treat your steel like a tool, not a toy, by inspecting for cracks and pitting every time you pull it out of the range bag.
Discipline is what happens when no one is watching, so make the habit of checking your backstop as natural as checking your chamber.
Putting it All Together

At the end of the day, shooting steel is about more than just the satisfaction of that metallic “ping” when you find your mark. It’s about the discipline you practiced before you even pulled the trigger. We’ve talked about checking your distances, verifying your backstop, and doing the unglamorous work of inspecting your targets for cracks or fatigue. If you skip the prep work or ignore the minimum engagement distances, you aren’t really practicing shooting; you’re just gambling with your equipment and your safety. Remember, the goal isn’t just to hit the target, but to master the process that makes hitting it possible every single time.
I’ve stood on this line for twenty years, and the people who truly progress are never the ones rushing to squeeze off rounds. They are the ones who treat their gear with respect and their safety protocols like second nature. When you stop treating safety as a chore and start treating it as a fundamental part of your skill set, everything changes. You’ll find that your focus sharpens and your consistency follows. Keep your eyes on your steel, keep your habits tight, and respect the discipline. If you do that, the sport will keep giving back to you for a long, long time.
Frequently Asked Questions
How do I know if my specific caliber is too much for the thickness of the steel I'm using?
You don’t guess with steel; you look at the math or the manufacturer’s spec sheet. If you’re running something like a .223, you’re looking at 3/8-inch plate minimum. If you move up to a .308, you better be looking at 1/2-inch or even 3/4-inch. If the steel starts looking “pockmarked” or develops deep craters, you’ve exceeded its capacity. That’s a sign the metal is fatigued. Don’t wait for it to crack.
What's the best way to spot hairline cracks or structural fatigue in a target before it becomes a safety issue?
You can’t just look at a target from fifty yards and hope for the best. I always tell people to grab a bright flashlight and a magnifying glass—or at least a decent pair of optics—and check the mounting points first. Look for “spiderwebbing” around the bolt holes or any discoloration that looks like stress. If you see a line that looks like a hair, treat it like a fracture. If it’s cracked, it’s scrap.
Should I be using a specific type of backstop or berm setup to handle the splashback from steel hits?
You don’t need a fancy specialized backstop, but you do need a proper berm. I’ve seen too many folks set up steel on a hard surface or shallow dirt, thinking they’re fine. You want a thick, forgiving pile of loose, clean earth behind that target. If the berm is too packed or too thin, that splashback becomes a problem. Keep the dirt loose and the depth substantial. That’s how you manage the energy.




